
Connecting your calendar
ASIST reads and writes the calendars registered in macOS. macOS signs in to Google and syncs with it; ASIST does not connect to Google directly. iCloud calendars work with the same steps. If your Google events already appear in the Mac’s Calendar app, start from step 4.
-
Add an account to Calendar on your Mac
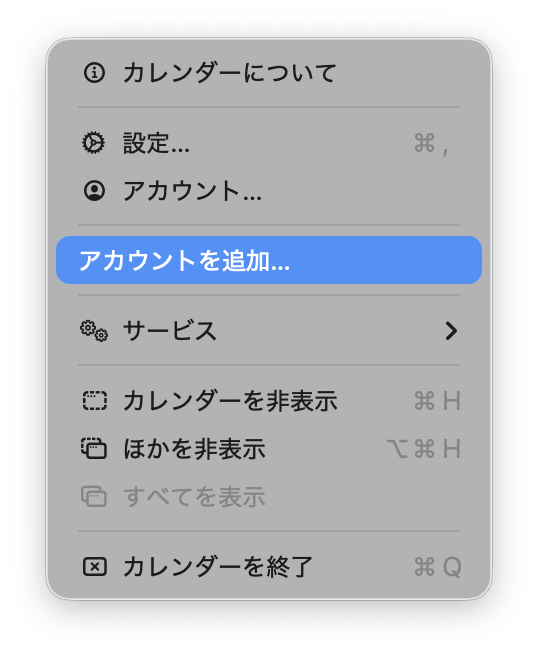
Open the Calendar app on your Mac, and choose Calendar > Add Account… in the menu bar.
-
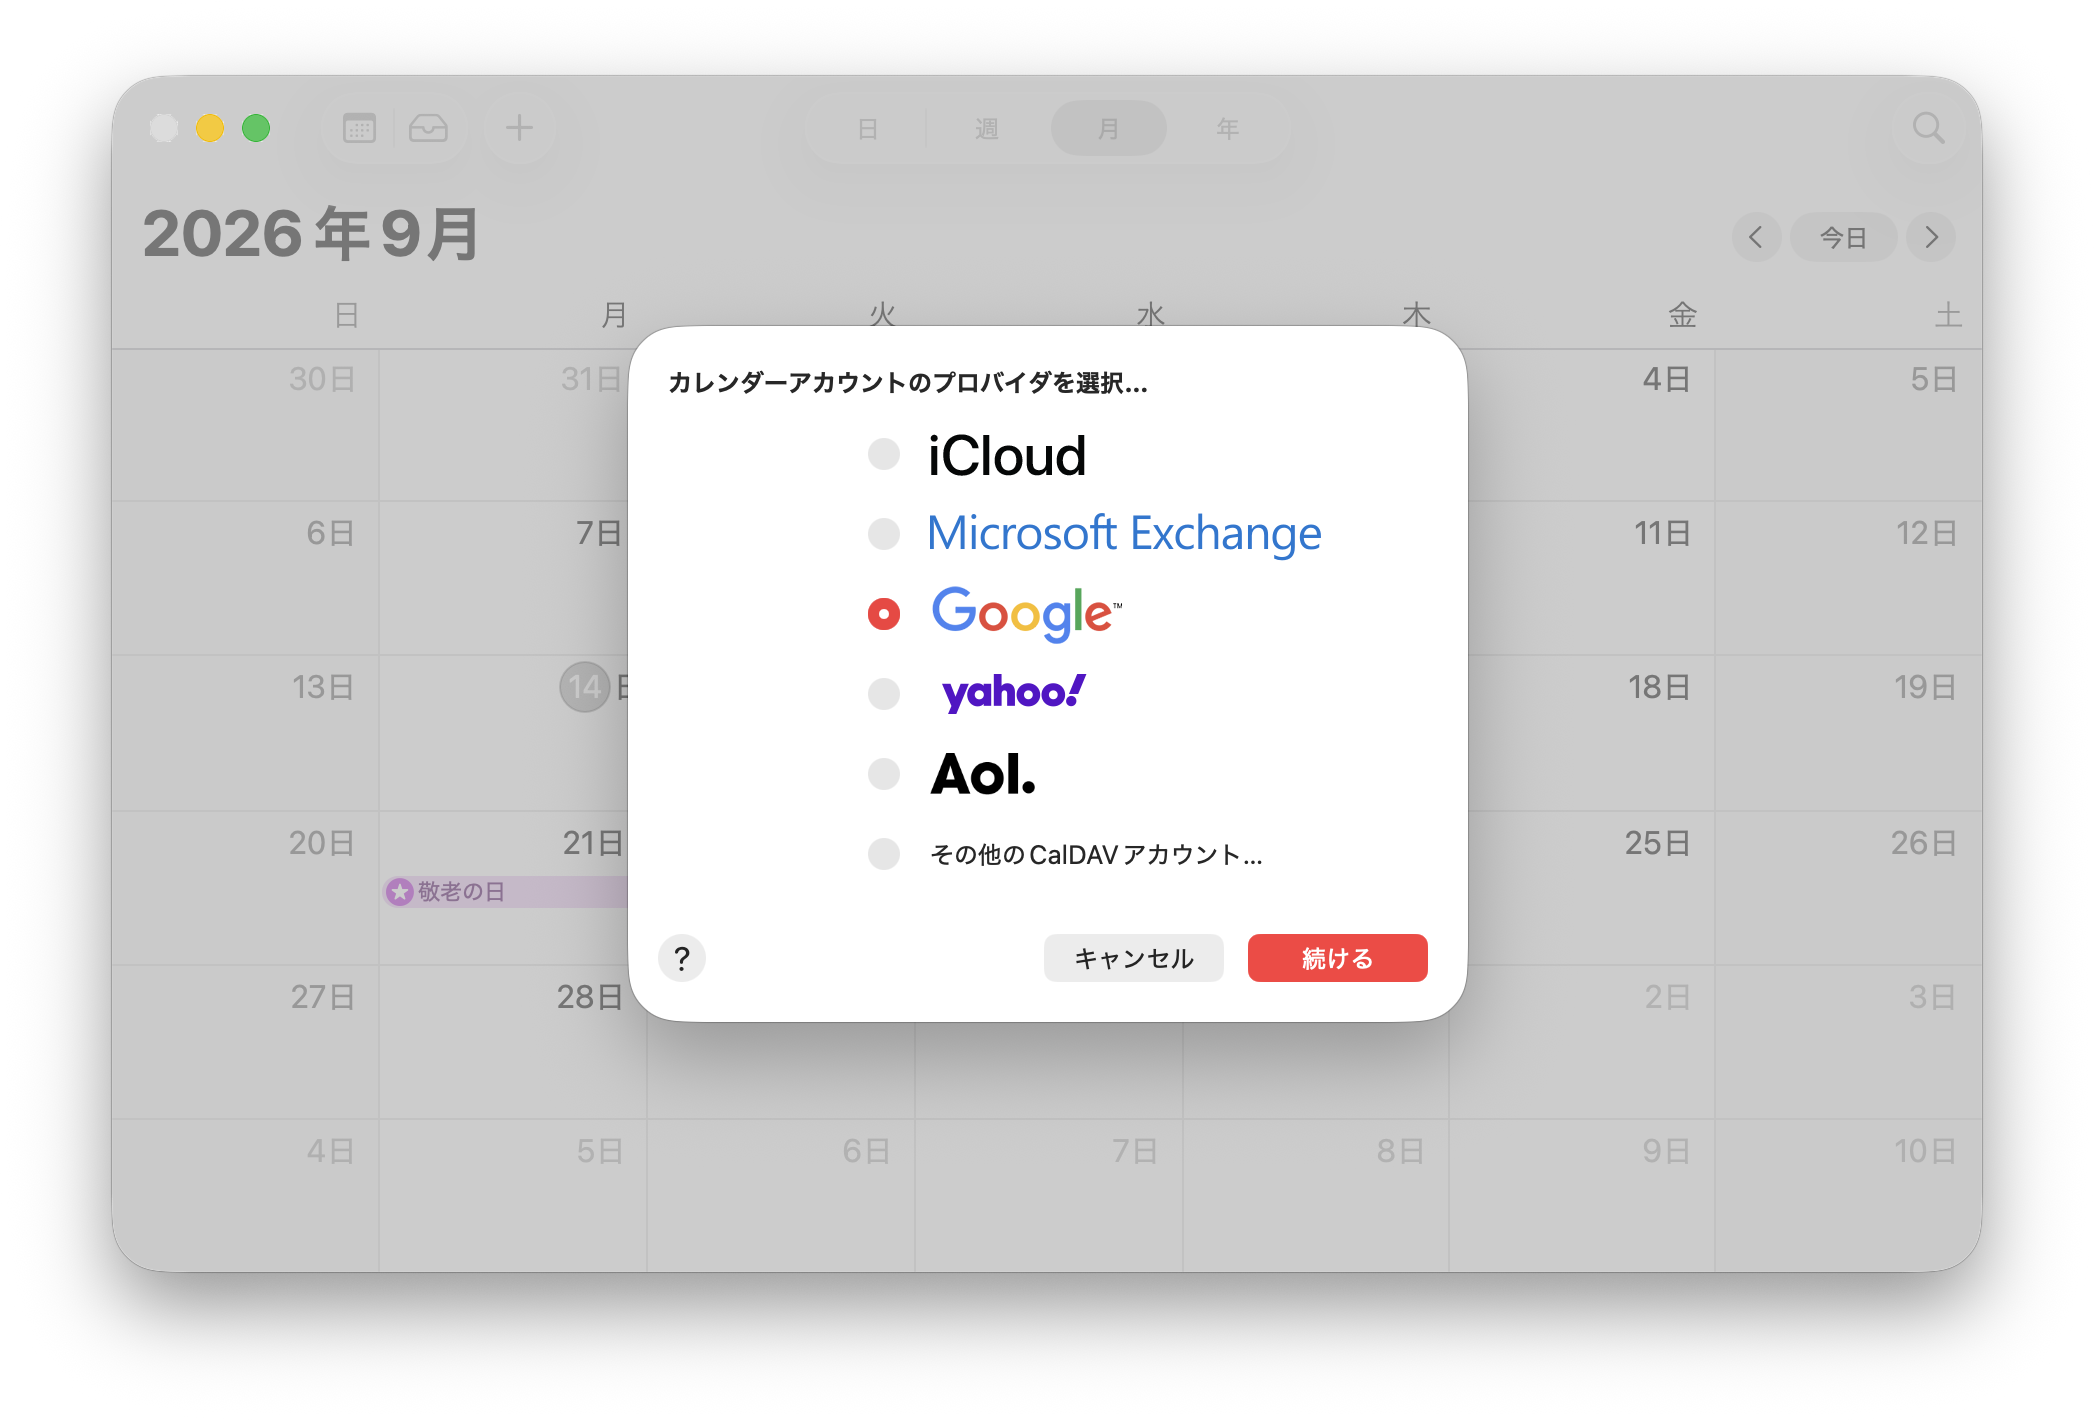
Choose Google
Choose “Google”, click “Continue” and sign in to the Google account you want to use.
-
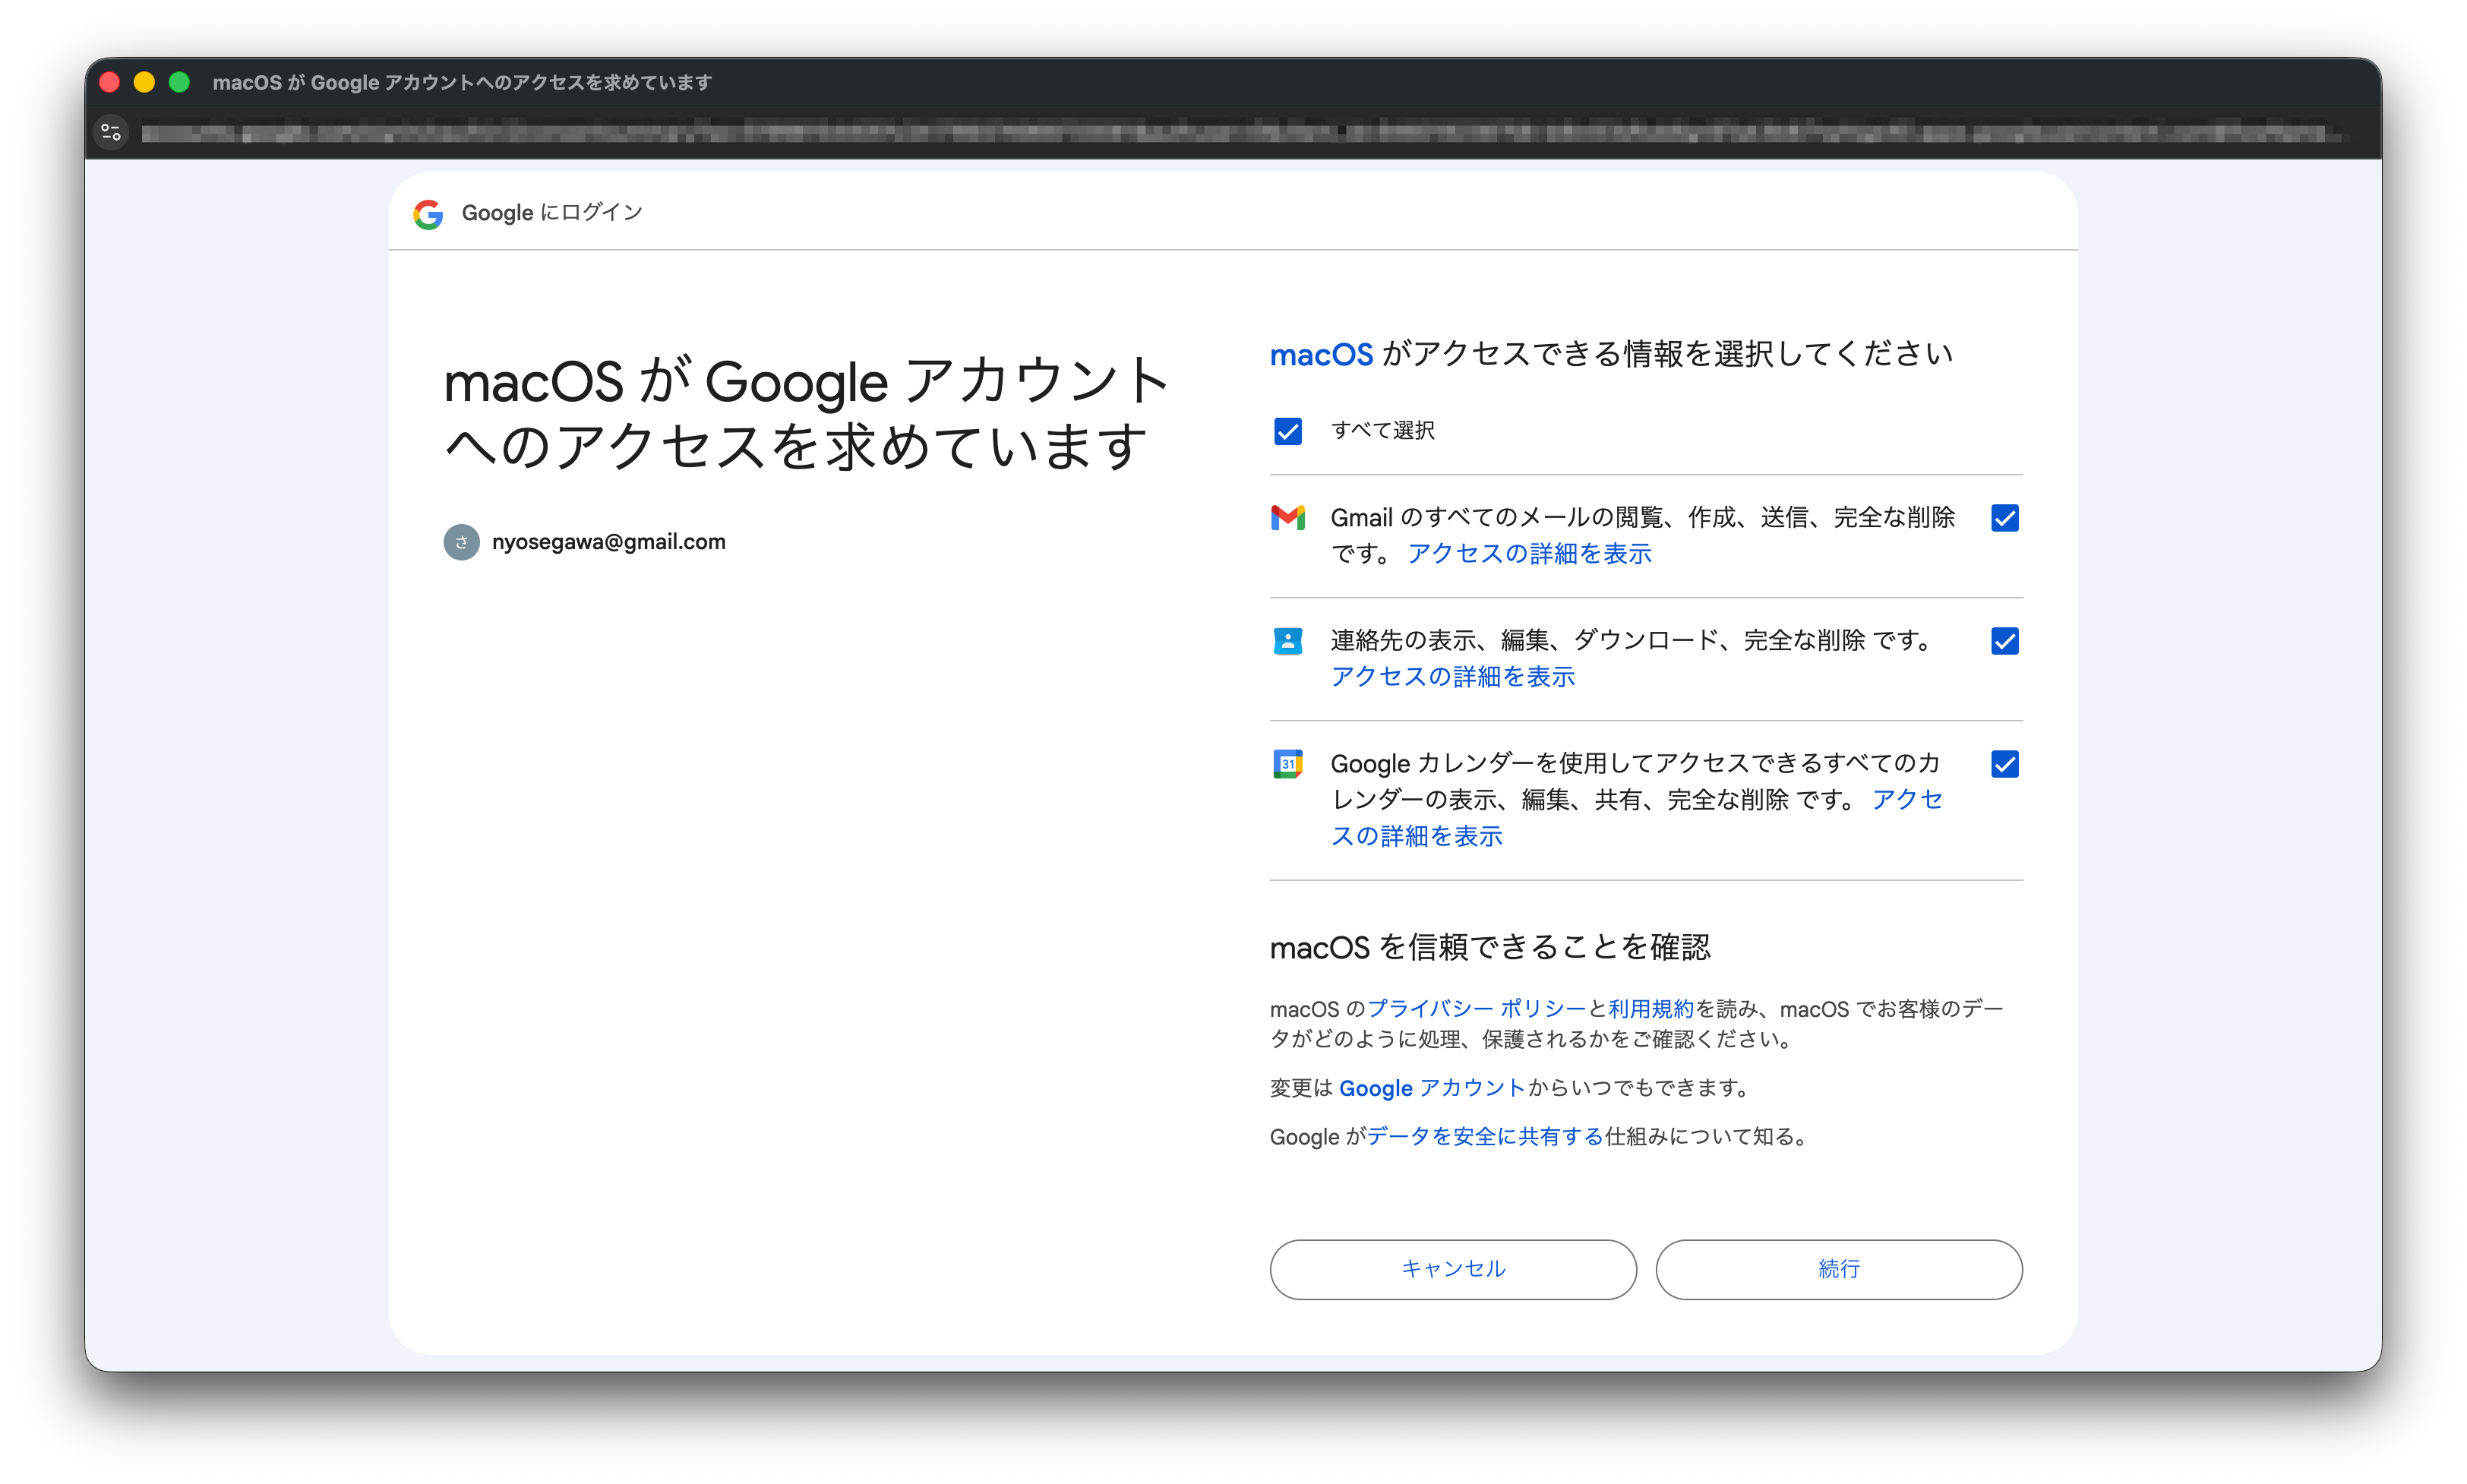
Allow macOS to access your Google calendars
When you see “macOS wants to access your Google Account”, check the calendar permission and continue. This permission is for macOS; you give ASIST its permission in the next step.
Once the account is added, check in System Settings > Internet Accounts that “Calendars” is turned on for that account, and wait until your events appear in the Mac’s Calendar app.
-
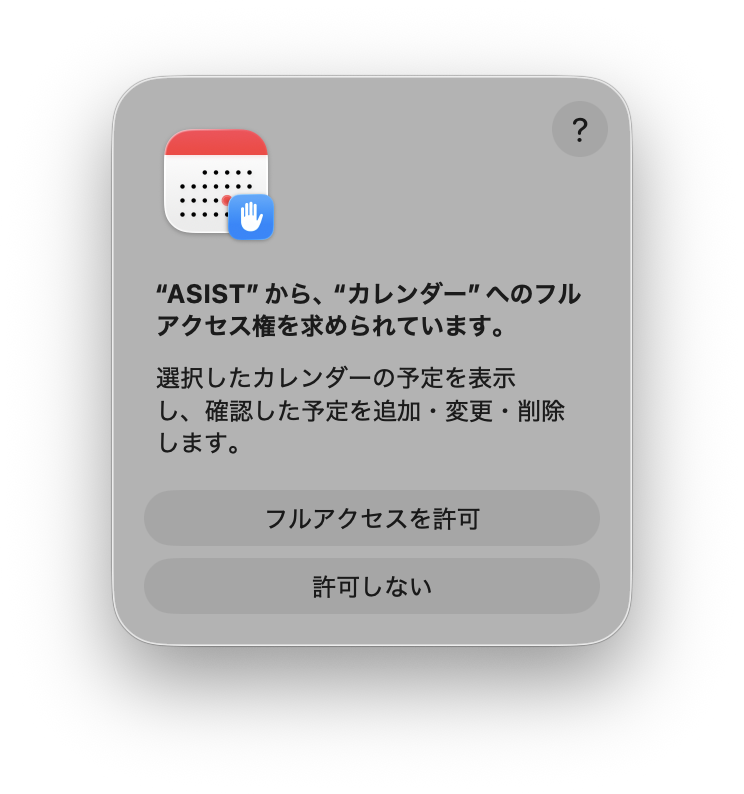
Allow ASIST
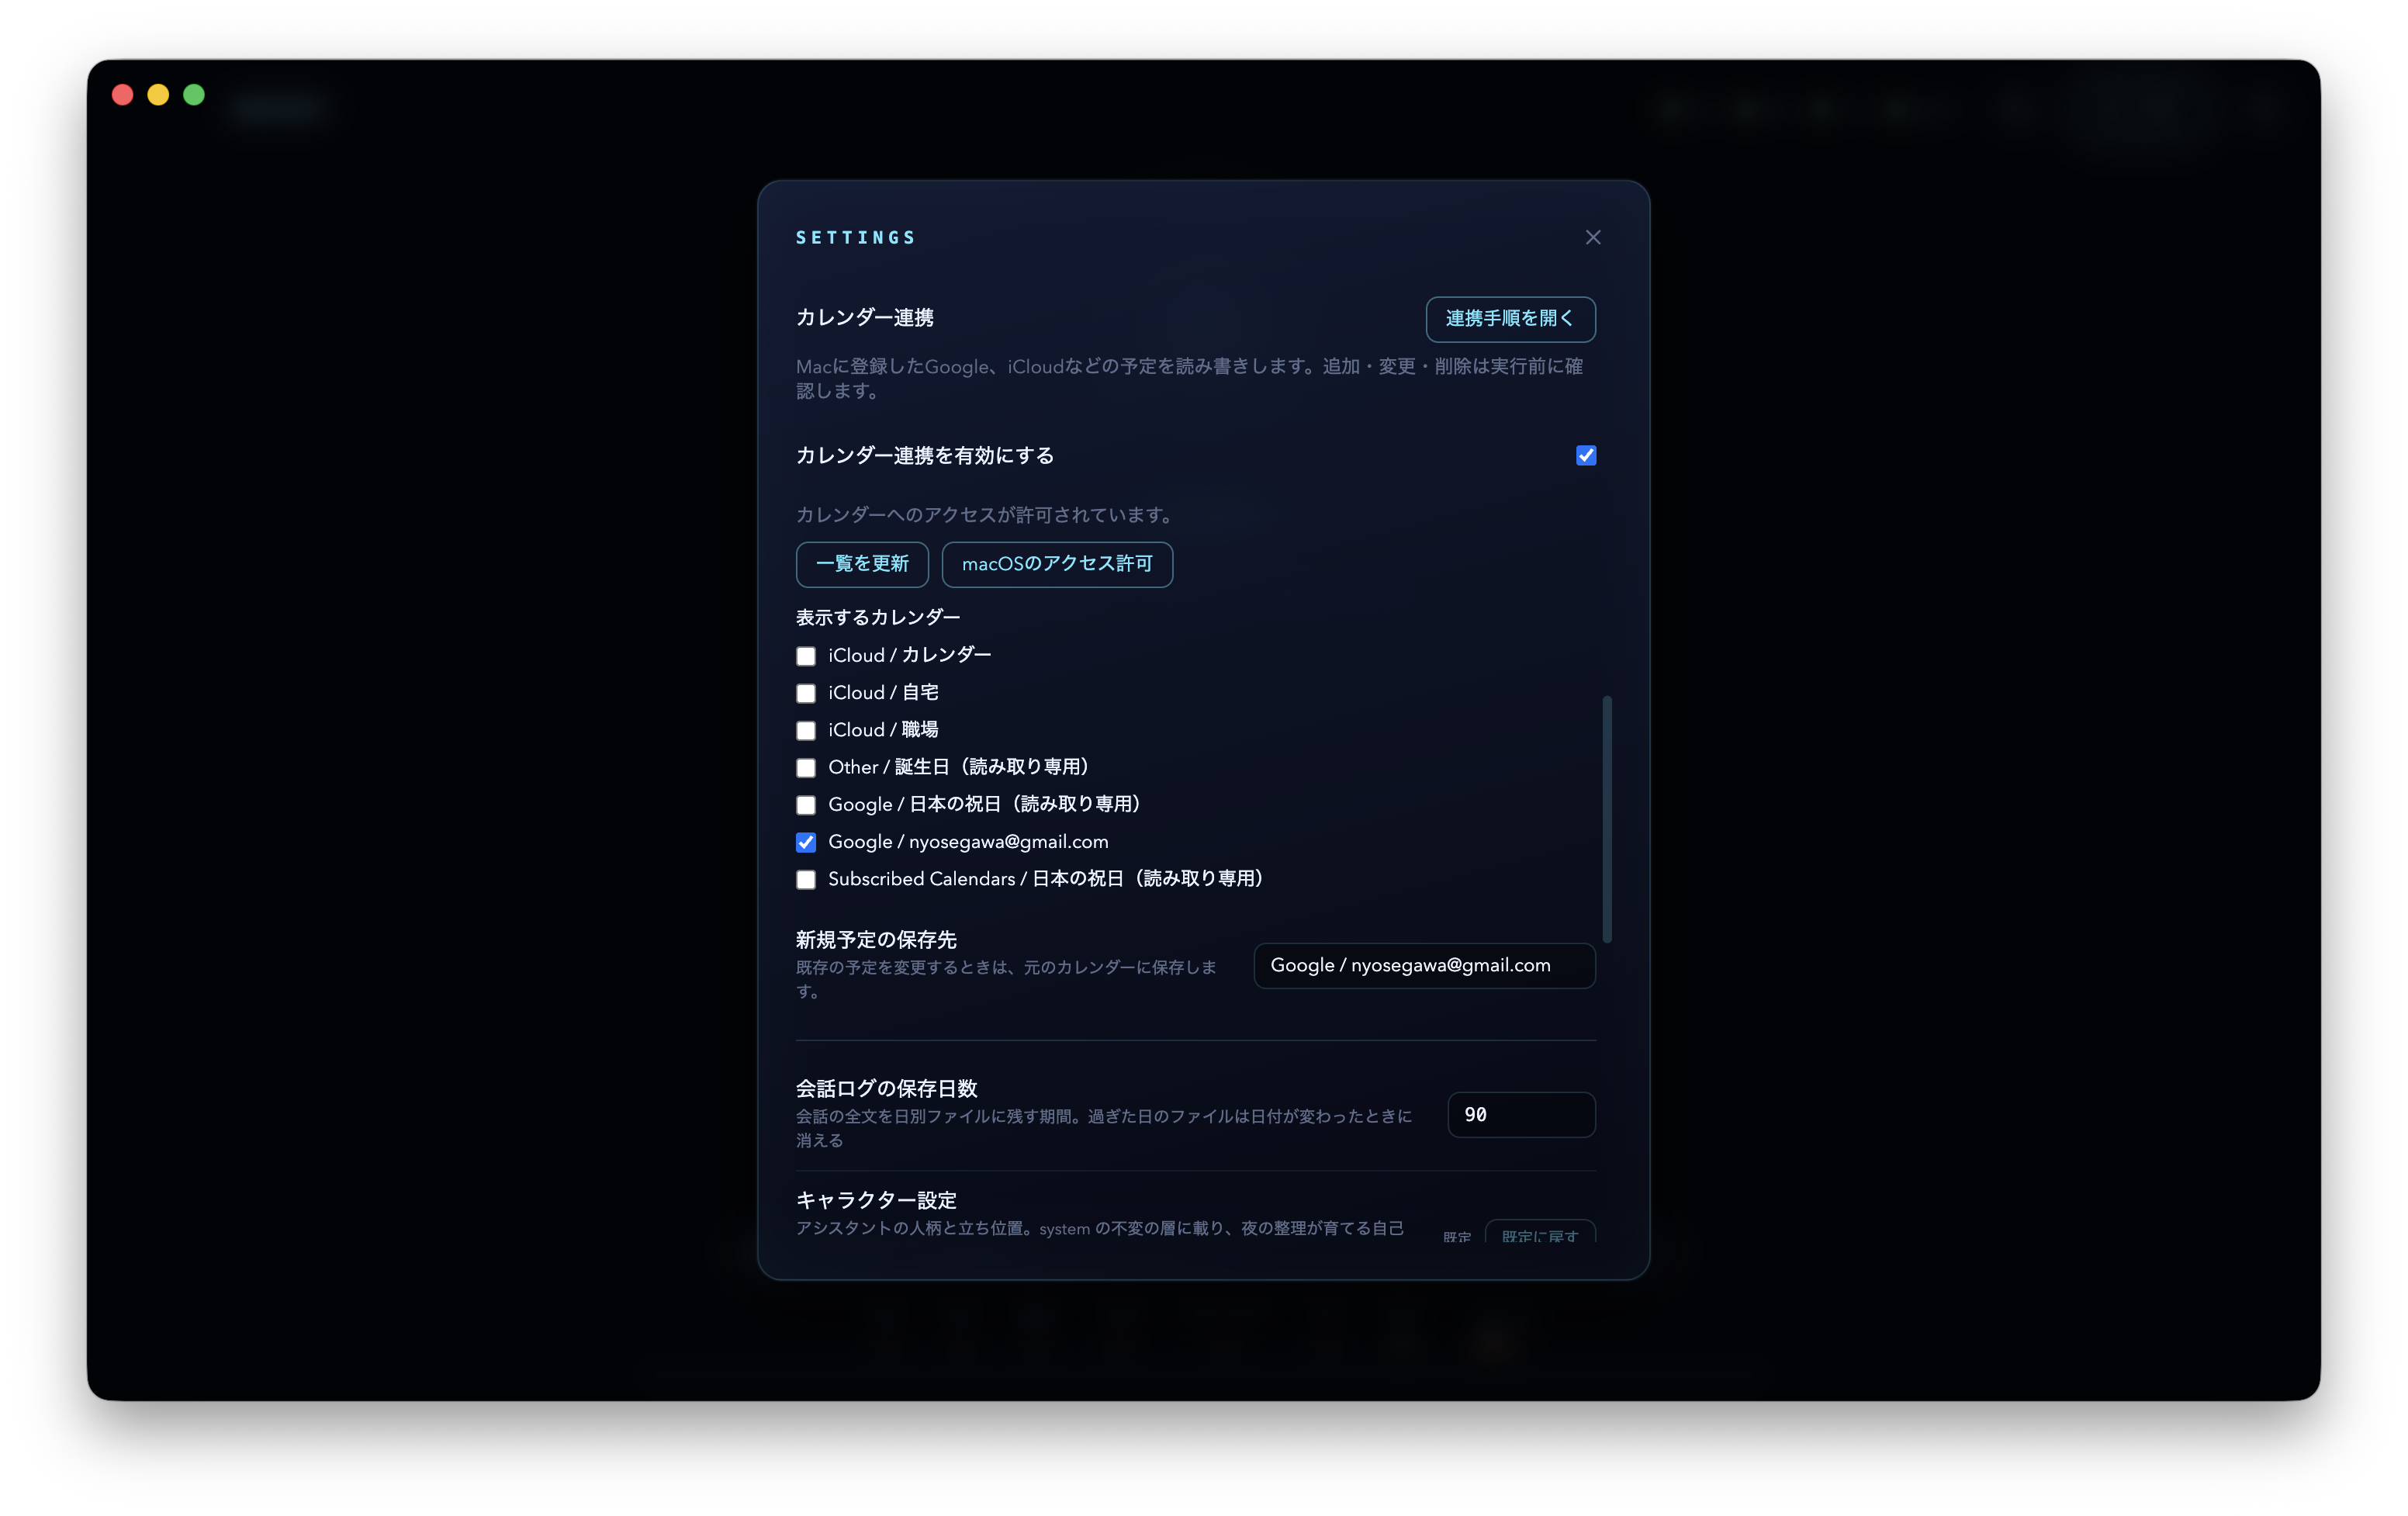
In the ASIST settings, under “Integrations”, turn on the “Turn the calendar integration on” switch. In the macOS dialog, click “Allow Full Access”.
-
Choose the calendars to show and where to save
Under “Calendars to show”, choose the calendars ASIST views and searches. Under “Calendar for new events”, choose the calendar where ASIST saves the events it adds. If you want them on Google, choose a Google calendar. Your choice is saved each time you make it.
-
Check it
Say “Show me today’s schedule” and check that the same events appear as in the Mac’s Calendar app. Next, ask “Add an event called Test from 10 to 10:30 tomorrow”, check the calendar, date, time and title on the confirmation screen, and approve it. Once you have confirmed that it also appears in Google Calendar, ask “Delete tomorrow’s Test event”.
If it does not connect
Section titled “If it does not connect”-
If you did not allow access, open System Settings from “macOS privacy settings” under “Integrations” in the settings, and give ASIST full access. Return to ASIST and click “Refresh the list”.
-
If your calendars do not appear, check whether events appear in the Mac’s Calendar app. If you added the account again, choose the calendars to show and the calendar for new events again in ASIST as well.
-
Calendars that cannot be written to, such as shared or subscribed calendars, can only be used for viewing.
-
Repeating events and events with invitations can be viewed and searched, but ASIST cannot change or delete them. Use the Mac’s Calendar app for those.
-
If an event does not appear on Google, check your Mac’s network connection and the account’s sync. If you do not know whether an event was added, do not ask for the same event again and again.
-
If the permission seems to be in a wrong state, remove it in Terminal, then turn the “Turn the calendar integration on” switch on again in ASIST and allow it again.
ターミナルウィンドウ tccutil reset Calendar com.nyosegawa.asist
How ASIST handles your events
Section titled “How ASIST handles your events”The macOS permission covers all your calendars. ASIST searches the calendars you chose to show, and creates new events in the calendar you chose for saving. Turning the integration off stops ASIST from reading and writing them. To remove the macOS permission as well, turn ASIST off in System Settings > Privacy & Security > Calendars.
Events handled in the conversation are sent to the provider of the conversation model you chose, so that it can write a reply. They may also stay in the conversation history and be used in memory curation.